The Apple Pencil is a powerful tool for artists, designers, and anyone who loves to take notes or draw on their iPads. But like any electronic device, it requires charging to function properly. If you’re new to the Apple Pencil or just need a refresher on How To Charge Apple Pencil, this step-by-step guide will walk you through the process.
Why Is Charging Your Apple Pencil Important?
Before we dive into the steps for charging your Apple Pencil, let’s first understand why it’s important to keep it charged.
Longer Battery Life

The Apple Pencil has a battery life of approximately 12 hours, depending on usage. By regularly charging your Apple Pencil, you can ensure that it has enough power to last through your creative sessions or workday.
Optimal Performance
A fully charged Apple Pencil will perform at its best, allowing you to create precise and accurate strokes on your iPad. If your Apple Pencil is low on battery, you may experience lag or other performance issues.
Avoiding Damage
Leaving your Apple Pencil uncharged for extended periods of time can cause damage to the battery, leading to a shorter overall lifespan. By regularly charging your Apple Pencil, you can avoid potential damage and ensure it lasts for years to come.
How To Charge Apple Pencil
Now that you understand the importance of charging your Apple Pencil, let’s dive into the steps for doing so.
Step 1: Check Your Apple Pencil’s Battery Level
Before you begin charging your Apple Pencil, it’s a good idea to check its battery level. This will give you an idea of how much charge it has left and how long it will take to fully charge.
To check your Apple Pencil’s battery level, simply swipe down from the top right corner of your iPad’s screen to access the Control Center. You should see a battery icon with the current percentage of your Apple Pencil’s battery.
Step 2: Connect Your Apple Pencil to Your iPad

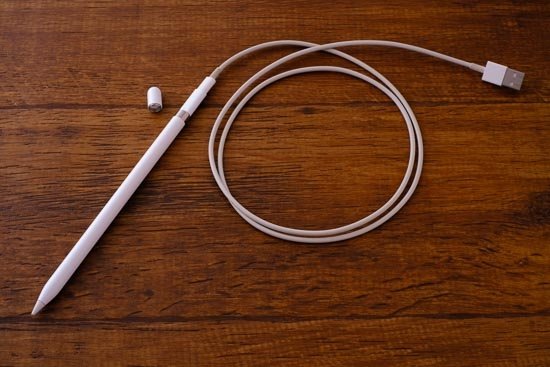
How To Charge Apple Pencil, you will need to connect it to your iPad. If you have a first-generation Apple Pencil, you can do this by removing the cap on the end of the pencil and plugging it into the Lightning port on your iPad.
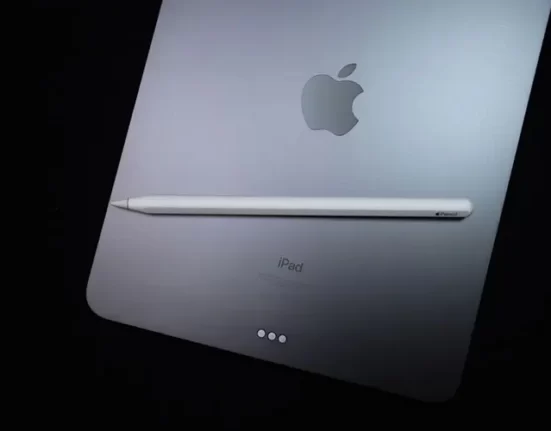
If you have a second-generation Apple Pencil, you can charge it by attaching it magnetically to the side of your iPad. The iPad will automatically detect the Apple Pencil and begin charging it.
Step 3: Monitor the Charging Progress
Once your Apple Pencil is connected to your iPad, you can monitor the charging progress by checking the battery icon in the Control Center. As the battery charges, the percentage will increase.
Step 4: Disconnect and Use Your Apple Pencil
Once your Apple Pencil is fully charged, you can disconnect it from your iPad and use it as desired. If you have a second-generation Apple Pencil, you can simply remove it from the magnetic attachment on the side of your iPad.
If you have a first-generation Apple Pencil, you will need to unplug it from the Lightning port and replace the cap on the end.
Tips for Maximizing Your Apple Pencil’s Battery Life
To ensure that your Apple Pencil stays charged and ready to use, here are some tips for maximizing its battery life.
Use Low Power Mode
If you’re using your Apple Pencil for extended periods of time, consider turning on Low Power Mode. This will reduce the amount of power your Apple Pencil uses, allowing it to last longer on a single charge.
To turn on Low Power Mode, go to Settings > Apple Pencil and toggle on Low Power Mode.
Turn Off Bluetooth When Not In Use

If you’re not using your Apple Pencil, consider turning off Bluetooth on your iPad. This will prevent your Apple Pencil from constantly searching for a connection, which can drain its battery.
To turn off Bluetooth, go to Settings > Bluetooth and toggle it off.
Keep Your Apple Pencil Clean
Dirt and debris can build up on the tip of your Apple Pencil, which can affect its performance and battery life. Regularly clean your Apple Pencil with a soft, lint-free cloth to remove any buildup.
Store Your Apple Pencil Properly
When not in use, it’s important to store your Apple Pencil properly to avoid damage and preserve its battery life. If you have a first-generation Apple Pencil, make sure to replace the cap on the end to protect the Lightning connector.
If you have a second-generation Apple Pencil, store it in a safe place away from magnets, as they can interfere with the magnetic attachment on your iPad.
Troubleshooting Common Charging Issues
If you’re having trouble charging your Apple Pencil, here are some common issues and how to troubleshoot them.
Apple Pencil Not Charging
If your Apple Pencil is not charging, try the following steps:
- Make sure your iPad is turned on and unlocked.
- Check the Lightning port on your iPad for any debris or damage.
- Try using a different Lightning cable or adapter.
- Restart your iPad and try charging again.
Slow Charging
If your Apple Pencil is charging slowly, try the following steps:
- Make sure you are using the correct charging method for your Apple Pencil (Lightning port for first-generation, magnetic attachment for second-generation).
- Check the battery level of your Apple Pencil and iPad. If both are low, it may take longer to charge.
- Turn off Low Power Mode on your iPad.
- Make sure your iPad is not in a case that is interfering with the magnetic attachment of the second-generation Apple Pencil.
Conclusion
How To Charge Apple Pencil is a simple process that is essential for maintaining its battery life and performance. By following the steps outlined in this guide, you can ensure that your Apple Pencil is always ready to use when you need it.
Remember to regularly check the battery level of your Apple Pencil and follow the tips for maximizing its battery life. If you encounter any issues, refer to the troubleshooting section for solutions.
With proper care and charging, your Apple Pencil will continue to be a valuable tool for all your creative and note-taking needs.
You may like reading about the following:
For more information, visit: Tech Me life


